Few things are as frustrating as reaching for your humidifier, ready to refill its tank, only to find the cap stubbornly refusing to budge. A stuck humidifier tank cap can bring your home’s humidity relief to a halt, leaving you with dry air and a minor household mystery. But don’t worry, this common problem is often easily solvable with the right approach.
This guide, drawing on years of experience with humidifiers, will walk you through effective methods to free a jammed cap, understand why it happens, and most importantly, how to prevent it from happening again.
Why Your Humidifier Cap Gets Stuck
Before diving into solutions, understanding the root causes of a stuck humidifier cap can prevent future headaches.
Mineral Buildup
|
Our Picks for the Best Humidifier in 2026
As an Amazon Associate I earn from qualifying purchases.
|
||
| Num | Product | Action |
|---|---|---|
| 1 | DREO Humidifiers for Bedroom, 3L Top Fill 30H & 26dB Quiet Runtime for Large Room, Cool Mist Ultrasonic Humidifier with Humidity Sensor, Night Light for Home, Baby, Nursery, Plants, New Edition |

|
| 2 | LEVOIT OasisMist 1000S (10L) Smart Humidifier for Home Large Room Bedroom, Last 100 Hours Suitable for Indoor Plant, Cover up to 600ft², Easy Top Fill, Remoter & Voice Control, Auto Mode, Quiet, White |
|
| 3 | Homvana Humidifiers for Bedroom Home, 3.6 L Cool Mist Top-Fill 34H Super Long Time, Quiet 23dB, Baby Humidifier, Oil Diffuser for Large Room, House, Plant, Nursery, Office, BPA FREE, Ultrasonic (Grey) |
|
| 4 | LEVOIT Humidifiers for Bedroom Large Room Home, (6L) Cool Mist Top Fill Essential Oil Diffuser for Baby & Plants, Smart App & Voice Control, Rapid Humidification & Auto Mode - Quiet Sleep Mode, Gray |
|
| 5 | Dreo Smart Humidifiers for Bedroom, Top Fill 4L Supersized Humidifier Large Room with 28 dB, 36H Runtime, Touch/APP/Voice Control, Nightlight, Cool Mist Humidifiers for Baby, Plants, Indoor, Black |
|
| 6 | LEVOIT Top Fill Humidifiers for Bedroom, 2.5L Tank for Large Room, Easy to Fill & Clean, 28dB Quiet Cool Mist Air Humidifier for Home Baby Nursery & Plants, Auto Shut-off for Safety, 25H |
|
| 7 | LEVOIT - Humidifiers for Bedroom - Quiet (3L Water Tank) - Cool Mist/Top Fill/Essential Oil Diffuser/25Watt - Home/Large Room - 360° Nozzle - Rapid Ultrasonic Humidification for Baby Nursery/Plant |
|
| 8 | LEVOIT Classic 160 Top-Fill Ultrasonic Cool Mist Humidifier, Super Easy to Fill and Clean, Quiet Operation for Bedroom Home Baby & Plants, Auto Shut-off for Safety, 360° Rotating Nozzle, 2.5L, Black |
|
| 9 | LEVOIT Humidifiers for Bedroom Home, Smart Warm and Cool Mist Air Humidifier for Large Room, Auto Customized Humidity, Fast Symptom Relief, Easy Top Fill, Essential Oil, Quiet, OasisMist4.5L, White |
|
| 10 | Dreo Humidifiers for Bedroom, 4L Top Fill for Large Room, 36H Runtime, 28 dB Quiet Supersized Cool Mist Air Humidifier for Baby Nursery, Plants, Indoor, Night Light, Easy to Clean & Fill, White |
|
The most frequent culprit behind a stubborn cap is the accumulation of mineral deposits, often referred to as “scale,” from hard water. Over time, as water evaporates, these minerals are left behind, forming a hardened layer on the cap’s threads or sealing gasket. This buildup acts like a cement, bonding the cap to the tank.
Overtightening
In an effort to prevent leaks, it’s natural to tighten the humidifier cap securely. However, over-tightening can jam the cap threads, especially if the plastic components are slightly warm or expand with water, making it incredibly difficult to unscrew later.
Pressure Buildup
Some humidifier tanks can experience a slight pressure differential, particularly if they have a spring-loaded valve at the bottom. This internal pressure, even minor, can create a suction effect or increase resistance, making the cap feel impossibly tight.
Damaged Threads or Cap
Wear and tear, cross-threading, or accidental damage to the cap or tank threads can also lead to it getting stuck. If the plastic is stripped or deformed, it won’t unscrew smoothly.
Before You Begin: Safety First
Always prioritize safety when attempting to fix any appliance.
- Unplug Your Humidifier: Ensure the unit is completely disconnected from power before handling the tank.
- Empty the Tank (If Possible): If you can, carefully empty any remaining water from the tank to reduce weight and potential spills. If the cap is completely stuck, you might not be able to do this immediately.
- Work Gently: Avoid excessive force that could crack the tank or damage the cap, turning a minor inconvenience into a need for replacement.
Methods to Loosen a Stuck Humidifier Cap
Here are several proven techniques, ranging from simple to more involved, to help you remove that stubborn humidifier cap.
Method 1: Release Internal Pressure
Many humidifier tanks feature a small, spring-loaded valve at the bottom of the cap. This valve is designed to allow water to flow into the humidifier’s base when the tank is inverted. If there’s any pressure or vacuum inside the tank, releasing it can make the cap easier to turn.
To do this, simply press down on the spring-loaded mechanism at the bottom of the cap for a few seconds. You might hear a small hiss or feel a slight release. After releasing the pressure, try unscrewing the cap again.
Method 2: Improve Your Grip
Sometimes, all you need is a little extra traction. The smooth plastic of humidifier caps can be hard to grip, especially when wet or if your hands are oily.
- Rubber Gloves or a Towel: Put on a pair of rubber dishwashing gloves or wrap a dry, thick towel around the cap. The added friction can provide the necessary grip to twist it open.
- Strap Wrench: For maximum grip and leverage, a rubber strap wrench (often used for opening jars or plumbing fixtures) can be incredibly effective. Wrap it snugly around the cap and twist.
Method 3: Apply Heat (Carefully)
Heat can cause plastic to expand slightly, potentially loosening the seal or breaking the bond of mineral buildup. Always proceed with caution when using heat to avoid damaging the plastic.
- Hot Water Soak: Invert the tank and submerge only the cap portion in a bowl of hot (but not boiling) water for 5-10 minutes. The heat will focus on the cap and its immediate threads.
- Hairdryer: Use a hairdryer on a low-to-medium heat setting to gently warm the cap around its edges. Move the dryer continuously to avoid concentrating heat in one spot. After a few minutes, try to unscrew the cap.
Method 4: Tackle Mineral Buildup
If hard water scale is the culprit, you need something to dissolve or break it down.
- Vinegar Soak: White vinegar is a natural descaler. If you can create a small pool around the cap, let vinegar sit there for an hour or two. Alternatively, if you can partially unscrew the cap, pour vinegar directly onto the exposed threads.
- Dish Soap: Apply a few drops of liquid dish soap around the rim where the cap meets the tank. Let it sit for 10-15 minutes to penetrate and lubricate the connection, then try twisting the cap using an improved grip (Method 2).
- CLR (Calcium, Lime, Rust Remover): For severe buildup, a dedicated descaling solution like CLR can be effective. However, use it with extreme caution and follow the product instructions precisely. Ensure it doesn’t come into contact with internal humidifier components that are not meant for contact with such chemicals, especially if the cap also contains a filter. Always rinse thoroughly afterward.
Method 5: Leverage with Tools (Extreme Caution)
As a last resort, if the cap is still stuck, you might need to use tools for added leverage. This method carries the highest risk of damaging the cap or tank, so proceed with extreme care.
- Pliers or Wrench: A large pair of adjustable pliers or a wrench can be used, but place a thick cloth between the tool and the cap to prevent scratching or cracking the plastic. Apply steady, firm pressure, twisting counter-clockwise.
- Butter Knives for Leverage: Some users have reported success by carefully wedging two dull butter knives into opposite grooves or tabs on the cap and using them as levers to turn. This requires a delicate touch to avoid snapping the plastic.
“A stuck humidifier cap is often a symptom of neglected maintenance. Regular cleaning and using appropriate water can save you a lot of hassle.” – Admin, Humidifiert.com
Table: Quick Fixes for a Stuck Humidifier Cap
| Problem | Recommended Solution | Tools/Materials | Caution |
|---|---|---|---|
| Overtightened/Slippery | Improve Grip | Rubber gloves, towel, strap wrench | Avoid excessive force |
| Pressure Buildup | Release Internal Pressure | Finger, small blunt object | Ensure cap is not overtightened before pressing |
| Mineral Scale/Buildup | Apply Heat or Dissolving Agents | Hot water, hairdryer, vinegar, dish soap, CLR | Avoid melting plastic; rinse CLR thoroughly |
| Extreme Jamming | Leverage with Tools (Last Resort) | Pliers, strap wrench, butter knives | High risk of damage to cap/tank; use with padding |
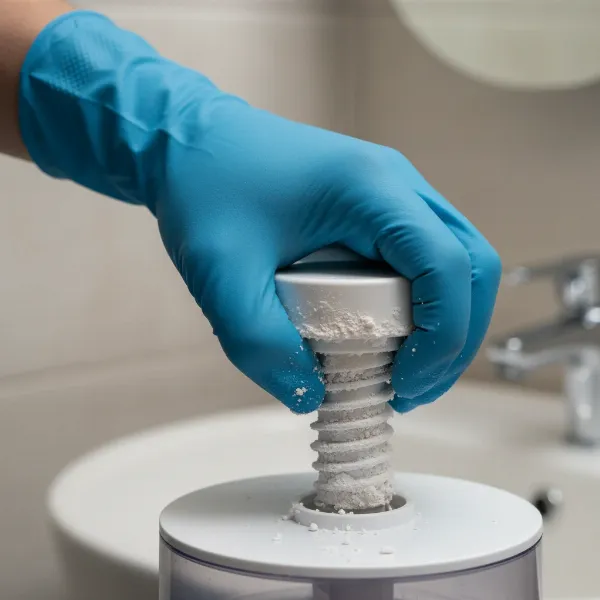 A hand wearing a rubber glove trying to unscrew a stuck humidifier tank cap with mineral buildup on the threads, illustrating improved grip and the problem of scale.
Preventing Future Stuck Humidifier Caps
The best way to deal with a stuck cap is to prevent it from happening in the first place.
Use Distilled or Demineralized Water
Hard water is the primary cause of mineral buildup. Switching to distilled or demineralized water will drastically reduce scale formation on your cap and throughout your humidifier.
Regular Cleaning and Descaling
Establish a routine for cleaning your humidifier tank and cap. At least once a week, empty the tank, wipe it down, and descale the cap and threads with a 50/50 white vinegar and water solution. Scrub away any visible mineral deposits.
Do Not Overtighten
When refilling, screw the cap on firmly until it’s snug, but avoid excessive force. There’s no need to crank it down; a good seal prevents leaks without jamming.
Lubricate Threads
Occasionally, after cleaning, apply a very thin layer of petroleum jelly, cooking oil, or food-grade silicone grease to the cap’s threads. This lubrication can help the cap turn smoothly and prevent sticking.
Inspect Cap for Damage
Periodically check your cap and tank threads for any signs of wear, cracks, or stripping. A damaged cap might need replacing to ensure a proper seal and easy removal.
When to Consider Replacement
Despite your best efforts, some caps might be beyond repair. If the cap is cracked, the threads are stripped, or the rubber gasket is torn and no longer seals properly, it’s time for a replacement. Continuing to use a damaged cap can lead to leaks and inefficient humidifier operation.
Conclusion
A stuck humidifier tank cap is a common household annoyance, often caused by mineral buildup, overtightening, or pressure. By systematically applying methods like releasing pressure, improving your grip, using heat, or tackling mineral deposits with natural descalers like vinegar, you can usually free a stubborn cap and restore your humidifier’s function. The key to long-term success, however, lies in consistent maintenance, using distilled water, and avoiding overtightening. With these simple practices, you can ensure your humidifier continues to provide comfortable, healthy air without any unwelcome sticking points. What are your go-to tricks for keeping your humidifier running smoothly?
Frequently Asked Questions
Can I use WD-40 on my humidifier cap?
It is generally not recommended to use WD-40 or similar petroleum-based lubricants on humidifier parts, especially those that come into contact with water or mist. These products can introduce chemicals into the air you breathe and may damage plastic components or seals over time. Opt for food-grade lubricants or natural alternatives like a thin layer of vegetable oil for lubrication.
How often should I clean my humidifier cap?
To prevent mineral buildup and ensure easy operation, it’s advisable to clean your humidifier cap at least once a week. This regular maintenance, along with using distilled water, significantly reduces the chances of the cap getting stuck and maintains the overall hygiene of your humidifier.
Is it safe to force a stuck humidifier cap?
Forcing a stuck humidifier cap with excessive strength or improper tools can lead to cracking the cap, stripping the threads, or damaging the tank itself. It’s safer to try the gentle methods outlined above, such as releasing pressure, improving grip, applying heat, or using descaling agents, before resorting to more forceful leverage. If it still won’t budge after multiple attempts, consider contacting the manufacturer or replacing the cap.