As the warm embrace of summer arrives, your trusty humidifier often takes a well-deserved break. However, simply tucking it away without proper preparation can lead to unpleasant surprises next season, from mold and mildew growth to diminished performance and a shortened lifespan. Understanding how to correctly store your humidifier during its off-season is crucial for maintaining its efficiency, ensuring hygienic operation, and extending its life for many winters to come. This comprehensive guide will walk you through every essential step, transforming your off-season storage from a simple task into a strategic maintenance ritual.
Why Proper Humidifier Storage Matters
Why should you dedicate time to carefully storing your humidifier? The significance of proper storage extends beyond mere tidiness; it directly impacts the longevity, hygiene, and effectiveness of your appliance. Neglecting proper care during the warmer months can invite a host of issues, turning your helpful device into a potential health hazard or a costly replacement.
Leaving water in the tank, even for a short period, can create a breeding ground for bacteria, mold, and mildew. These microorganisms thrive in damp environments and can lead to foul odors or, more seriously, be dispersed into your indoor air when the unit is reactivated. Moreover, mineral deposits from hard water can solidify and become much harder to remove after months of drying, potentially clogging internal components and reducing the humidifier’s output. Proper storage prevents these problems, safeguarding your investment and ensuring that your humidifier is ready to deliver clean, healthy moisture the moment cooler temperatures return.
Essential Steps for Pre-Storage Cleaning
Before your humidifier enters its summer slumber, a thorough cleaning is non-negotiable. This critical step eliminates mineral buildup, disinfects surfaces, and prevents the growth of mold and bacteria that could otherwise fester during storage. A diligent cleaning process now will save you headaches and extensive scrubbing when you retrieve it later.
Start by emptying all water from the tank and base. Disassemble all removable parts, such as the water tank, base, filters (if applicable), and any other components that come into contact with water. Wash these parts thoroughly with warm, soapy water. For mineral scale, a common issue, create a solution of equal parts white vinegar and water. Soak affected parts in this solution for at least 20-30 minutes, or longer for heavy buildup, then scrub gently with a soft brush or sponge. Rinse all components thoroughly with clean water to remove any vinegar residue or loosened deposits.
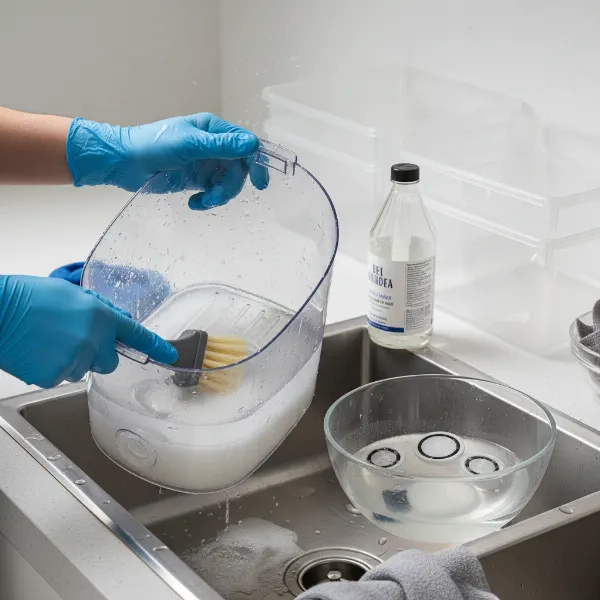 Person thoroughly cleaning humidifier parts with white vinegar solution before summer storage
Once clean, it is vital to disinfect your humidifier parts. A common method involves filling the water tank with a solution of one teaspoon of bleach per gallon of water, or using a manufacturer-recommended disinfectant. Let this solution sit for about 30 minutes, ensuring all water-contacting surfaces are exposed. After disinfecting, rinse all parts multiple times with fresh water until the smell of bleach or disinfectant is completely gone. This comprehensive cleaning and disinfection process is the cornerstone of effective summer storage, ensuring a pristine start to the next humidification season.
Drying Your Humidifier for Long-Term Storage
After meticulous cleaning and disinfection, the single most important step before storage is ensuring every component of your humidifier is completely, 100% dry. Even the slightest hint of moisture can undermine all your cleaning efforts, creating a perfect environment for mold and mildew to flourish while the unit is inactive. Proper drying is crucial for preventing microbial growth and unpleasant odors upon retrieval.
To achieve complete dryness, air-dry all disassembled parts thoroughly. You can place them on a clean towel or drying rack in a well-ventilated area, away from direct sunlight, for at least 24 to 48 hours. Some people even use a small fan to circulate air around the components, speeding up the drying process. Pay particular attention to crevices, seals, and internal sections that might trap moisture. Once you believe the parts are dry, give them an extra inspection and a few more hours if there’s any doubt. This thorough drying process eliminates any potential for moisture-related issues, preserving your humidifier’s integrity for its next active cycle.
Disassembly and Packing Techniques
Once your humidifier is sparkling clean and bone dry, the next phase involves careful disassembly and thoughtful packing. This stage is designed to protect delicate components from damage and to keep everything organized, making reassembly straightforward when the time comes. Incorrect packing can lead to warped plastics, lost parts, or even electrical damage.
Consult your humidifier’s user manual for specific disassembly instructions. Generally, this involves removing the water tank, any internal filters, and separating the base from the mist outlet. If your unit has a removable power cord, detach it and coil it neatly. For filters, if they are meant for single-season use, dispose of them now. If reusable, clean and dry them according to manufacturer instructions before storing separately or with the unit.
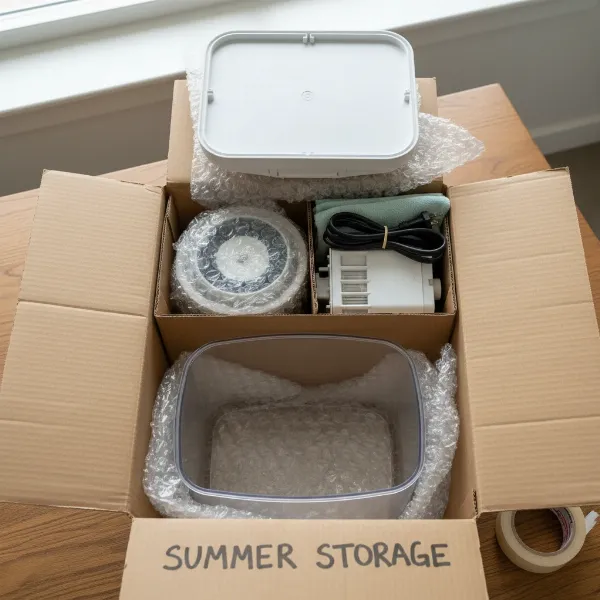 Organized packing of a disassembled humidifier into its original box for summer storage
When packing, consider using the original packaging, as it’s designed to fit all components securely. If unavailable, use a sturdy cardboard box that is appropriately sized. Wrap individual delicate components, like the mist nozzle or any electronic parts, in bubble wrap or soft packing material to prevent scratches and impacts. Place the power cord in a small bag and label it, or secure it within the main unit. Ensure no parts are crammed or under undue pressure. A well-packed humidifier is a protected humidifier, ready to resume its duties without a hitch.
Choosing the Ideal Storage Location
The environment where you store your humidifier plays a significant role in its preservation. Selecting the right spot can protect it from extreme temperatures, dust, pests, and moisture, ensuring it remains in optimal condition throughout its inactive period. A poor storage location, conversely, can undo all your diligent cleaning and packing efforts.
The ideal storage location is cool, dry, and dust-free. Basements, attics, and garages are often subject to significant temperature fluctuations and high humidity, which can be detrimental. For instance, high humidity in storage can promote mildew even after thorough drying, while extreme heat can warp plastic components. Instead, consider a closet, a pantry, or a dedicated storage cabinet inside your main living space. These areas typically maintain a more stable temperature and humidity level.
Ensure the chosen spot is free from direct sunlight, which can degrade plastic over time, and away from any potential sources of moisture or leaks. Storing the unit on a shelf rather than directly on the floor can also offer better protection from dust and accidental impacts. By providing a stable, protective environment, you safeguard your humidifier from external elements and help it endure the summer months gracefully.
> “Proper off-season storage is not just about putting your humidifier away; it’s an active step in preventative maintenance that pays dividends in longevity and performance.” – Dr. Elena Petrova, Environmental Health Specialist
What to Avoid During Storage
While focusing on the “do’s” of humidifier storage, it’s equally important to be aware of the “don’ts.” Certain practices can inadvertently damage your unit, compromise its hygiene, or complicate its revival next season. Avoiding these common pitfalls is key to a truly successful storage period.
First and foremost, never store your humidifier with any residual water in the tank or base. This is an open invitation for mold, mildew, and bacteria to proliferate, creating a significant health risk upon reuse. Secondly, avoid storing it in damp or excessively humid environments like unfinished basements or sheds, as this can encourage microbial growth even on dry surfaces and potentially damage electronic components. Similarly, extreme temperature fluctuations, such as those found in attics or uninsulated garages, can stress and crack plastic parts.
Do not store your humidifier near chemicals, paints, or strong odors, as these can be absorbed by the plastic and impart an unpleasant smell to the mist when the unit is reactivated. Lastly, resist the urge to store it haphazardly. Simply tossing it into a box without proper cleaning, drying, or protective packing leaves it vulnerable to dust, physical damage, and the development of internal issues that could be difficult or impossible to resolve later. Thoughtful handling ensures your humidifier remains a reliable companion.
Preparing for Next Season’s Use
Even after a perfect storage period, a little preparation is needed before your humidifier is ready to spring back into action. This final step ensures it performs optimally and hygienically from the very first use of the new season. Skipping this stage can undermine all your previous efforts.
Begin by retrieving your humidifier from storage and unboxing it. Inspect all components for any signs of damage or wear that might have occurred during the inactive months. Reassemble the unit according to your user manual, ensuring all parts fit securely. Before adding water, it’s highly recommended to give the water tank and base a quick rinse with a mild soap and water solution, followed by a thorough fresh water rinse. This helps to wash away any dust that might have settled during storage and ensures no lingering odors.
If your humidifier uses a wick filter or demineralization cartridge, replace it with a new one. Even if they appear clean, old filters can harbor unseen bacteria or have reduced efficacy over time. Finally, fill the tank with fresh, distilled water (if recommended by the manufacturer) and run the unit on a low setting for a short period, perhaps 30 minutes, in a well-ventilated room. This allows it to “flush out” any remaining stagnant air or dust and ensures it’s operating correctly before it becomes an integral part of your indoor air quality strategy.
Conclusion
Proper summer storage for your humidifier is far more than a simple chore; it’s a vital investment in its longevity, efficiency, and the health benefits it provides. By diligently following the steps of thorough cleaning, meticulous drying, careful packing, and selecting an optimal storage location, you protect your appliance from common pitfalls like mold growth, mineral damage, and premature wear. This proactive approach ensures that when the dry air of winter returns, your humidifier is ready to deliver clean, comfortable moisture without a hitch, saving you both time and money in the long run. Isn’t peace of mind, knowing your air quality solution is always ready, worth a little effort now?
Frequently Asked Questions
What happens if I don’t clean my humidifier before storing it?
|
Our Picks for the Best Humidifier in 2026
As an Amazon Associate I earn from qualifying purchases.
|
||
| Num | Product | Action |
|---|---|---|
| 1 | LEVOIT Classic 160 Top-Fill Ultrasonic Cool Mist Humidifier, Super Easy to Fill and Clean, Quiet Operation for Bedroom Home Baby & Plants, Auto Shut-off for Safety, 360° Rotating Nozzle, 2.5L, Black |

|
| 2 | LEVOIT Humidifiers for Bedroom Home, Smart Warm and Cool Mist Air Humidifier for Large Room, Auto Customized Humidity, Fast Symptom Relief, Easy Top Fill, Essential Oil, Quiet, OasisMist4.5L, White |
|
| 3 | LEVOIT - Humidifiers for Bedroom - Quiet (3L Water Tank) - Cool Mist/Top Fill/Essential Oil Diffuser/25Watt - Home/Large Room - 360° Nozzle - Rapid Ultrasonic Humidification for Baby Nursery/Plant |
|
| 4 | DREO Humidifiers for Bedroom, 3L Top Fill 30H & 26dB Quiet Runtime for Large Room, Cool Mist Ultrasonic Humidifier with Humidity Sensor, Night Light for Home, Baby, Nursery, Plants, New Edition |
|
| 5 | LEVOIT Top Fill Humidifiers for Bedroom, 2.5L Tank for Large Room, Easy to Fill & Clean, 28dB Quiet Cool Mist Air Humidifier for Home Baby Nursery & Plants, Auto Shut-off for Safety, 25H |
|
| 6 | LEVOIT OasisMist 1000S (10L) Smart Humidifier for Home Large Room Bedroom, Last 100 Hours Suitable for Indoor Plant, Cover up to 600ft², Easy Top Fill, Remoter & Voice Control, Auto Mode, Quiet, White |
|
| 7 | LEVOIT Humidifiers for Bedroom Large Room Home, (6L) Cool Mist Top Fill Essential Oil Diffuser for Baby & Plants, Smart App & Voice Control, Rapid Humidification & Auto Mode - Quiet Sleep Mode, Gray |
|
| 8 | Homvana Humidifiers for Bedroom Home, 3.6 L Cool Mist Top-Fill 34H Super Long Time, Quiet 23dB, Baby Humidifier, Oil Diffuser for Large Room, House, Plant, Nursery, Office, BPA FREE, Ultrasonic (Grey) |
|
| 9 | Dreo Smart Humidifiers for Bedroom, Top Fill 4L Supersized Humidifier Large Room with 28 dB, 36H Runtime, Touch/APP/Voice Control, Nightlight, Cool Mist Humidifiers for Baby, Plants, Indoor, Black |
|
| 10 | Dreo Humidifiers for Bedroom, 4L Top Fill for Large Room, 36H Runtime, 28 dB Quiet Supersized Cool Mist Air Humidifier for Baby Nursery, Plants, Indoor, Night Light, Easy to Clean & Fill, White |
|
If you don’t clean your humidifier before storing it, residual water and mineral deposits can foster the growth of mold, mildew, and bacteria. This can lead to unpleasant odors, unhygienic operation, and potentially damage the internal components, making it less effective or even unusable next season.
Can I store my humidifier in the garage during summer?
Storing your humidifier in the garage during summer is generally not recommended. Garages often experience extreme temperature fluctuations and high humidity, which can warp plastic components, encourage mold growth, or damage electronics, reducing the unit’s lifespan and performance.
How do I remove stubborn mineral buildup from my humidifier?
To remove stubborn mineral buildup, create a solution of equal parts white vinegar and water. Soak the affected parts for several hours or overnight, then gently scrub with a soft brush. For very tough deposits, a specialized descaling solution might be necessary, always following the manufacturer’s instructions.
Should I dispose of my humidifier filter before storage?
Yes, it’s generally best to dispose of used wick filters or demineralization cartridges before storing your humidifier for the summer. Even if they look clean, they can harbor bacteria and lose efficiency over time. Replacing them at the start of the next season ensures optimal performance.
Is it safe to use tap water to clean my humidifier?
Yes, it is safe to use tap water for cleaning your humidifier. However, for descaling, a solution of white vinegar and water is more effective. Always rinse thoroughly with tap water afterwards to remove all cleaning agents before drying and storing the unit.